The Ideal Dimensions of a Recording Studio Control Room: A Comprehensive Guide
When designing a recording studio, one of the most critical aspects to consider is the control room. This space is where audio engineers and producers will spend the majority of their time mixing and mastering tracks, so it’s crucial that the control room is optimized for both comfort and acoustics. In this article, we’ll explore the ideal dimensions of a recording studio control room, discuss the key factors that influence these dimensions, and offer practical tips for achieving the best acoustic environment.
Understanding Control Room Dimensions
The Importance of Control Room Dimensions
The dimensions of a recording studio control room are not merely a matter of aesthetics; they play a crucial role in the acoustics and overall functionality of the space. Proper dimensions can help minimize problematic audio reflections, standing waves, and bass traps, ensuring that the sound you hear during mixing is as accurate as possible.
Key Factors Influencing Control Room Dimensions
- Room Proportions: The ratio of length, width, and height can significantly impact the acoustics of a control room. Ideally, you want to avoid square or cuboid rooms as they tend to cause acoustic issues like standing waves and flutter echoes.
- Room Volume: The overall volume of the control room affects how sound waves interact within the space. Larger rooms generally offer better acoustics but may require more treatment to address low-frequency issues.
- Room Shape: Irregular room shapes can help diffuse sound more effectively than perfectly rectangular rooms. However, practical considerations and budget constraints often lead to more conventional shapes.
Ideal Dimensions for a Control Room
Recommended Room Ratios
The ideal dimensions of a control room are often based on ratios derived from acoustic research. The most commonly recommended ratios are:
- The Golden Ratio: Approximately 1:1.618. For example, a room that is 10 feet wide would be about 16 feet long and 6 feet high. This ratio helps minimize standing waves and provides a balanced acoustic environment.
- The 1:1.5:2 Ratio: A popular ratio among audio professionals is 1:1.5:2. This means if your room is 10 feet wide, it would be 15 feet long and 20 feet high. This ratio is effective in reducing modal problems and maintaining a good balance across frequencies.
- The 1:1.4:1.9 Ratio: Another widely accepted ratio is 1:1.4:1.9. For instance, if the room is 10 feet wide, it would be approximately 14 feet long and 19 feet high. This configuration helps to control low-frequency issues and provides a natural sound decay.
Practical Dimensions
For most professional and home studios, practical dimensions often fall within these guidelines:
- Width: 10 to 15 feet. A width of 12 feet is often considered ideal for maintaining a good balance between audio accuracy and room space.
- Length: 15 to 20 feet. Longer rooms are preferable as they help to minimize low-frequency issues and create a more accurate listening environment.
- Height: 8 to 12 feet. A height of 10 feet is generally recommended as it provides enough space to treat the room acoustically without causing the space to feel too cavernous.
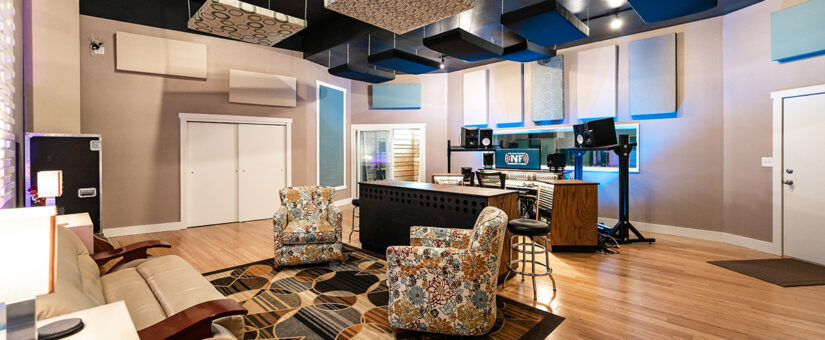
Acoustic Treatment and Layout
Acoustic Treatment
Regardless of the room dimensions, acoustic treatment is crucial for achieving the best sound. Key areas to focus on include:
- Bass Traps: Place bass traps in corners to control low-frequency buildup. This is especially important in rooms with dimensions that might exacerbate bass issues.
- Diffusers: Use diffusers to scatter sound waves and reduce flutter echoes. These are often placed on the rear wall and ceiling.
- Absorptive Panels: Position absorptive panels on walls and ceilings to control mid and high frequencies. This helps to reduce reflections and improve clarity.
Desk and Speaker Placement
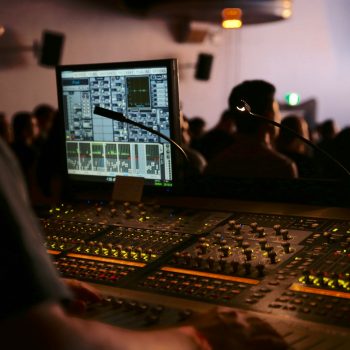
The placement of your mixing desk and studio monitors is also vital. The desk should be positioned against the long wall of the room, with speakers placed in an equilateral triangle with the listener. Ensure that monitors are at ear level and equidistant from the listener to maintain accurate sound imaging.
Additional Considerations
Acoustic Isolation
In addition to dimensions, consider acoustic isolation to prevent sound leakage and external noise interference. This might include using soundproofing materials for walls, ceilings, and floors, as well as sealing gaps around doors and windows.
Room Shape and Design
While conventional rectangular rooms are often used, more complex shapes can be beneficial. Incorporating angled walls or non-parallel surfaces can help diffuse sound and improve overall acoustic performance. However, these designs can be more costly and challenging to implement.
Budget and Space Constraints
Your budget and available space will ultimately dictate the dimensions and design of your control room. It’s essential to balance acoustic quality with practical constraints. Even if you can’t achieve the ideal dimensions, proper treatment and layout can significantly improve the acoustic performance of any space.
Conclusion
The ideal dimensions of a recording studio control room are a blend of theoretical principles and practical constraints. By following recommended room ratios, understanding the importance of acoustic treatment, and considering the specific needs of your space, you can create a control room that supports accurate audio monitoring and mixing. Remember that while dimensions are crucial, the implementation of proper acoustic treatment and thoughtful design will ultimately define the success of your recording studio.
By incorporating these insights and maintaining a focus on acoustic principles, you can design a control room that enhances your recording and mixing capabilities, ensuring professional results in any studio environment.
- On 02/05/2025