How to Convert Vinyl to Digital: A Comprehensive Guide
Vinyl records have made a significant resurgence in recent years, capturing the hearts of audiophiles and casual listeners alike. However, as we continue to embrace digital music formats, many enthusiasts find themselves wanting to convert their beloved vinyl collections into digital files. This guide will provide you with a thorough understanding of the process, from the equipment you’ll need to the steps for achieving the best sound quality.
1. Understanding the Appeal of Vinyl
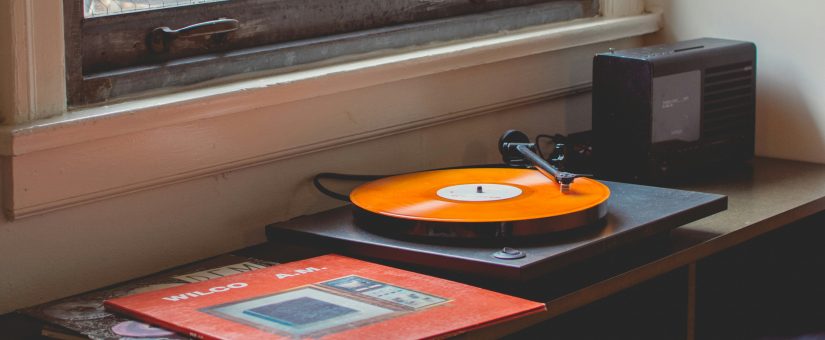
Vinyl records offer a unique listening experience that many find appealing. The warm, rich sound and tactile nature of handling records can evoke nostalgia and a deeper connection to the music. However, vinyl has its limitations: it’s bulky, susceptible to wear and tear, and not as portable as digital formats. Converting vinyl to digital allows you to enjoy the best of both worlds—preserving your collection while making it more convenient.
2. Equipment Needed for Conversion
2.1. Turntable
Your turntable is the most critical piece of equipment in this process. Look for a model with:
- Quality cartridge and stylus: These are essential for capturing the nuances of your records.
- Built-in preamp: This can simplify your setup, although you can also use an external preamp for better sound quality.
- USB output: Many modern turntables come with USB outputs specifically designed for digital conversions.
2.2. Computer
You’ll need a computer with enough storage and the ability to run audio editing software. Both Windows and macOS platforms can handle this task.
2.3. Audio Interface (Optional)
If your turntable doesn’t have a USB output, you may need an audio interface to connect your turntable to your computer. This device can help improve sound quality and reduce noise.
2.4. Software
You’ll need software to record and edit your audio. Some popular options include:
- Audacity (free, open-source)
- GarageBand (Mac only)
- Adobe Audition (paid, more advanced features)
2.5. Cables
Ensure you have the necessary cables, such as RCA cables or USB cables, to connect your turntable to your computer or audio interface.
3. Preparing Your Vinyl Records
Before you start the conversion process, it’s essential to ensure your vinyl records are in the best possible condition:
3.1. Cleaning Your Records
Dust, dirt, and fingerprints can affect sound quality. Consider using a record cleaning brush or a more advanced record cleaning solution. For stubborn grime, a record cleaning machine may be worth the investment.
3.2. Inspecting for Damage
Check your records for scratches, warps, or other damage that could impact playback. Minor scratches might be negligible, but deep ones can cause skips.
4. Setting Up Your Equipment
4.1. Connect Your Turntable
If your turntable has a USB output, simply connect it directly to your computer. For other turntables, connect them to an audio interface, then connect that interface to your computer.
4.2. Adjusting Levels
Before recording, adjust the input levels on your audio interface or computer. You want to ensure the audio isn’t too quiet (which can introduce noise) or too loud (which can cause clipping).
5. Recording the Vinyl
5.1. Open Your Software
Launch your audio recording software and set up a new project. Make sure to select the correct input source (your turntable or audio interface).
5.2. Prepare to Record
Place the vinyl record on the turntable and get ready to start the recording. It’s often best to record the entire side of the record at once, as this minimizes interruptions and ensures a smooth playback.
5.3. Hit Record
Start the recording software and carefully lower the stylus onto the record. Monitor the levels during recording to ensure they remain within the desired range.
5.4. Stop Recording
Once the side is finished, stop the recording. Save the file in a lossless format (like WAV or FLAC) to preserve audio quality.
6. Editing Your Digital Files
6.1. Splitting Tracks
Most vinyl records have multiple tracks on each side. Use your software to split the recording into individual tracks. Look for the beginning and end of each song, and cut the audio accordingly.
6.2. Removing Noise
Use noise reduction tools to eliminate pops, clicks, or background noise. Be careful not to overdo it, as this can affect the overall sound quality.
6.3. Equalization
Consider applying equalization (EQ) to enhance the audio. This might involve boosting bass, cutting harsh highs, or adjusting mids to create a balanced sound.
6.4. Adding Metadata
Adding metadata (track titles, artist names, album title, and genre) is crucial for organizing your digital library. Most audio editing software allows you to edit this information easily.
7. Saving and Backing Up Your Files
7.1. Choose a File Format
For the best quality, save your recordings in a lossless format like WAV or FLAC. If you need smaller files for portable devices, consider high-quality lossy formats like MP3 or AAC.
7.2. Backing Up Your Files
It’s wise to back up your digital files in multiple locations, such as an external hard drive or cloud storage. This ensures that your music collection is safe from hardware failures.
8. Transferring to Devices
Once your vinyl has been converted and edited, you can transfer the files to your preferred devices—smartphones, tablets, or digital audio players. Use software like iTunes, MusicBee, or Windows Media Player to organize and sync your music library.
9. Enjoying Your Digital Library
Now that you’ve successfully converted your vinyl records to digital format, you can enjoy your music in a more convenient and portable way. Create playlists, share your music with friends, or simply bask in the nostalgia of your vinyl collection, now accessible anytime, anywhere.
10. Conclusion
Converting vinyl to digital is a rewarding process that allows you to preserve your cherished music while enjoying the conveniences of modern technology. With the right equipment and a little patience, you can create high-quality digital copies of your favorite records. Whether you’re looking to keep your collection alive or simply want to listen on the go, this guide provides all the information you need to get started on your vinyl-to-digital journey.
- On 01/20/2025


